Add Assets and choose their type
Add Assets and choose their type
Use Context > Assets to save reusable company material, such as logos, photographs, reference ads and supporting files. Use Knowledge instead when Njord AI should search or read the file's contents. Adding an asset does not automatically add it to Knowledge.
Where to find it: Open Our company > Context, scroll to Assets, then choose Add asset. Admins and Client admins can add and manage assets; other workspace members can view them.
Choose the right type
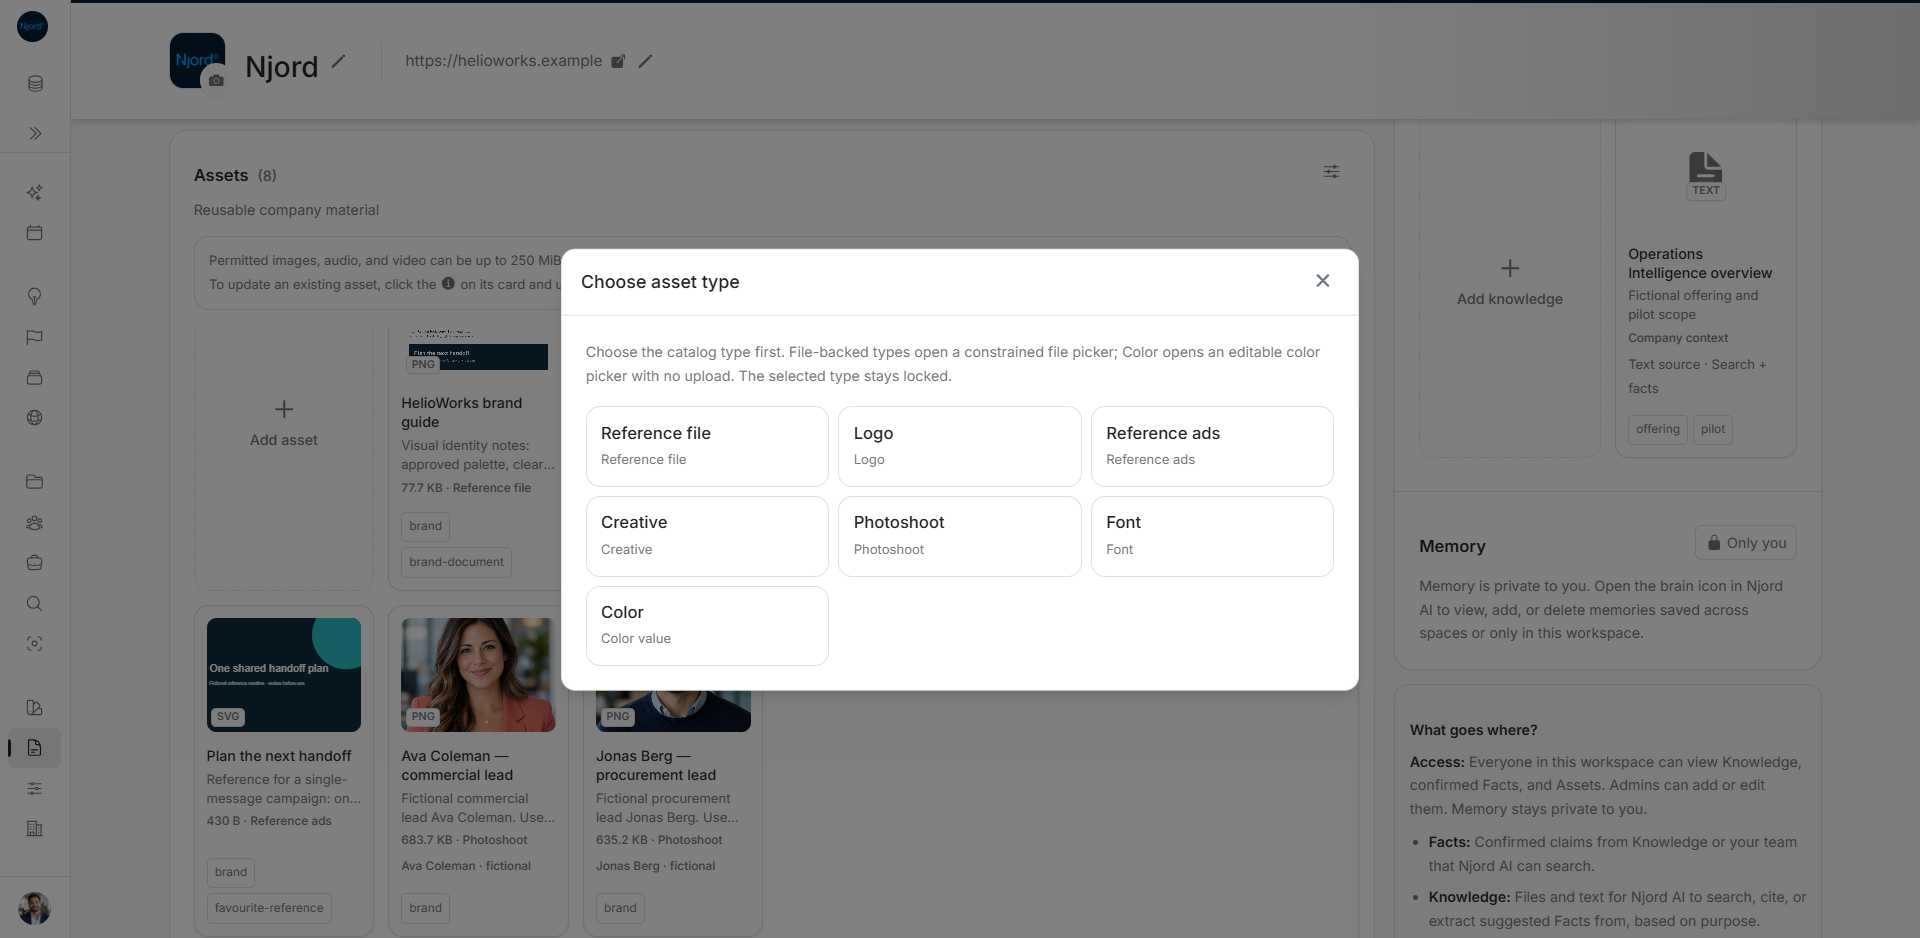
- Choose Add asset to open Choose asset type.
- Select the category that describes how you will use the material.
- For a file-based type, select one or more accepted files. Choosing Color opens a form instead of a file picker.
Image guide: The current Context chooser shows Reference file, Logo, Reference ads, Creative, Photoshoot, Font and Color in this sample workspace. The available categories and accepted formats come from your workspace's catalog. Captured in light mode, without browser chrome or a cursor.
| Type | Use it for |
|---|---|
| Logo | Original company logos and wordmarks. Accepted logo formats can include raster images, SVG, AI, EPS and PDF. |
| Creative | Artwork and campaign images. |
| Photoshoot | Portraits and other photography. You can optionally select a workspace member or enter the person's name. |
| Reference ads | Examples that show a useful advertising idea or approach. |
| Font | Font files in an accepted format. A saved font source link can point to where the font is available. |
| Color | A named color and its six-digit hex value; no file is uploaded. |
| Reference file | Supporting material that the team should be able to reuse. |
Your catalog may also offer Video, Audio, Template and Presentations. Use the formats accepted by the selected category. The type stays locked during review and cannot be changed in the saved asset's details, so check it before continuing.
For Photoshoot raster images, a short side of 1080 pixels is recommended. Smaller images are accepted. If you choose a person, check that it is the intended workspace member; a manually entered name does not create a member account.
Choose separate assets or versions
One selected file opens its review. Several files first open How should we save these files?.
| Choice | When to use it |
|---|---|
| Separate assets | Different photographs, different font weights or files that each need their own title and usage instructions. Each file becomes a separate item. |
| One asset with versions | Revisions or size variants of the same item. The files share one title, description and tags, and remain available in version history. |
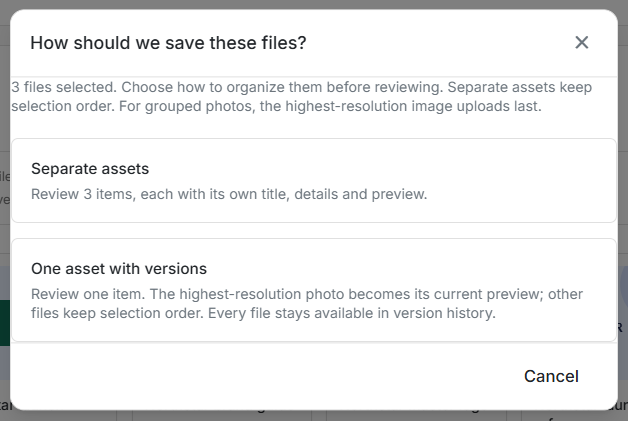
Image guide: Choose how to organise the selected files before reviewing their details. This earlier Context screenshot uses three fictional sample files; the grouping choices still apply.
Grouping requires files of one asset type. Mixed types stay separate. Matching filenames do not group files automatically. Grouping different font weights as versions would leave only the current weight in the normal preview, so keep those as separate assets.
Choosing One asset with versions from Add asset creates a new item. It does not find or update an existing item with the same name. To revise a saved item, open its View details > File versions > Add version action instead.
Review the details before saving
- Check each file's preview and Title. Separate assets have a review card for each item; grouped versions share one card.
- Fill in What should we use this for?. Explain when and how the team should use the asset. This description is required for Font and Color; it is optional for other types.
- Add useful Tags and press Enter after each tag. Tags help people find related assets through filters.
- For a Photoshoot item, check the optional person field. You can choose a workspace member or enter a name manually.
- For grouped files, check Upload order and Current preview. Use Add more files if needed, then check the count and order again. Removing a grouped review card removes all of its staged files.
- Choose Add asset or Add N assets to save. Selecting files alone does not upload them.
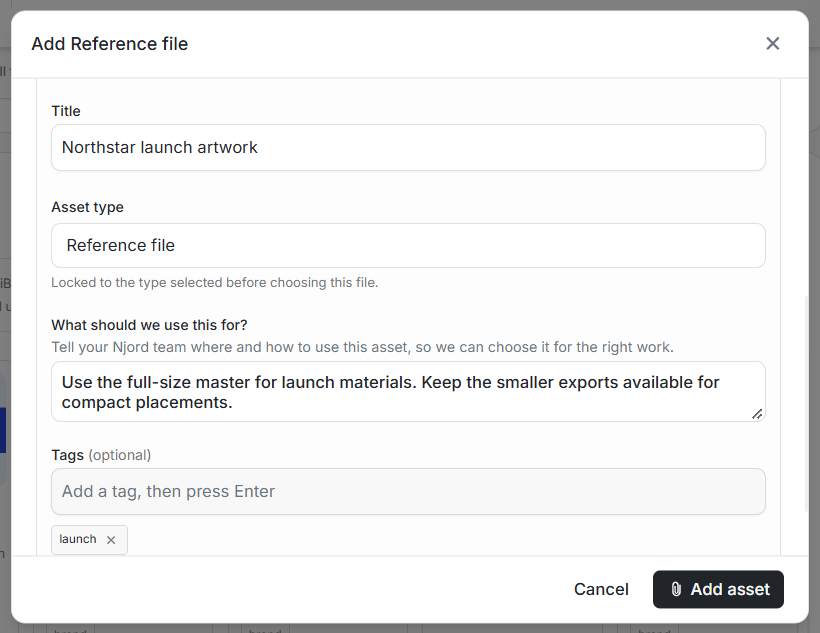
Image guide: This earlier Context example gives the fictional launch artwork a clear title, instructions for using its master file, and a launch tag. The selected type remains locked.
Titles can contain up to 512 characters and descriptions up to 500. You can add up to 50 tags, each up to 128 characters. Check any validation message before saving.
Add a Color without uploading a file
- Choose Add asset > Color.
- Enter a clear Name.
- Pick a color or enter its six-digit hex code, such as #29BAC2.
- Complete the required What should we use this for? field. For example: use this accent for chart highlights on white backgrounds.
- Add any useful tags, then choose Add color.
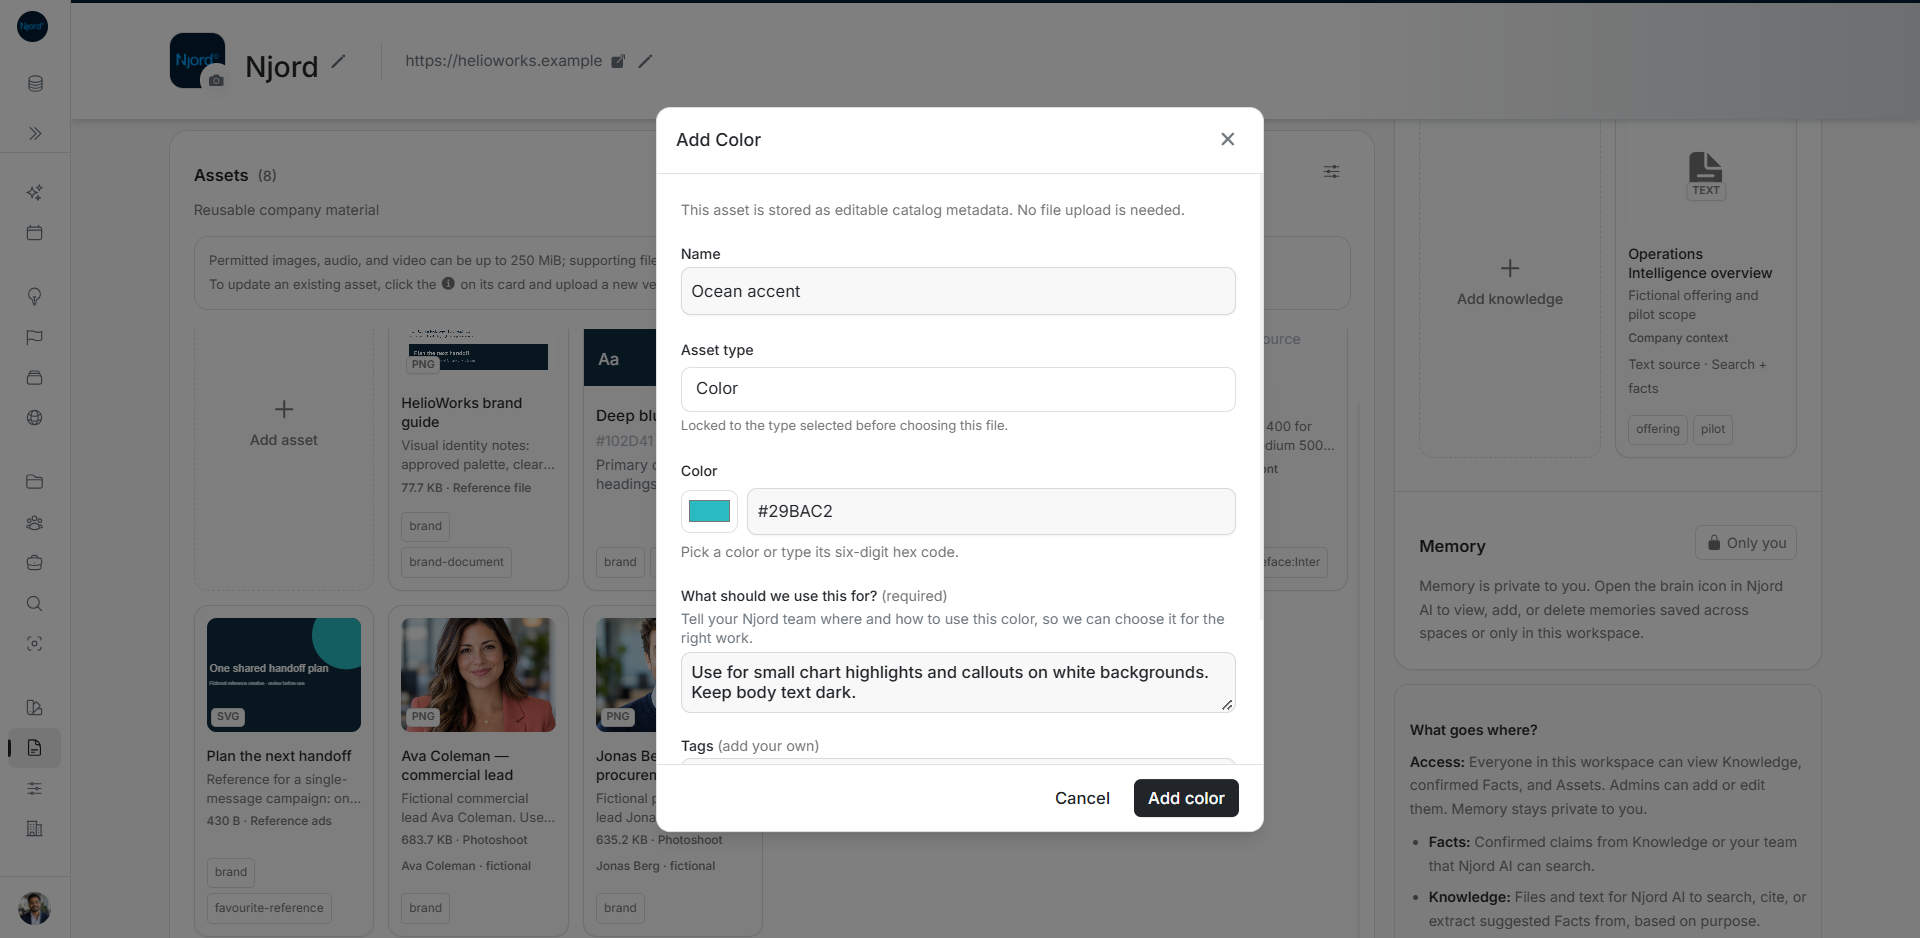
Image guide: The fictional Ocean accent example shows a name, color value and practical usage instructions. A Color is saved as an editable value, not an uploaded file. This form was staged for the screenshot and cancelled without saving.
A blank or whitespace-only description prevents a Font or Color from being saved. A saved Font without a description also needs one added and saved before you upload another file version.
Check which version becomes current
For a group of images, the image with the largest measured resolution, width × height, moves to the end of the upload order and becomes current. If two images tie, the last selected one wins. The other files keep their relative order.
SVG has no fixed raster resolution. A group with no measurable image dimensions keeps selection order. Groups containing non-image files keep selection order too. Always check the final order shown in review.
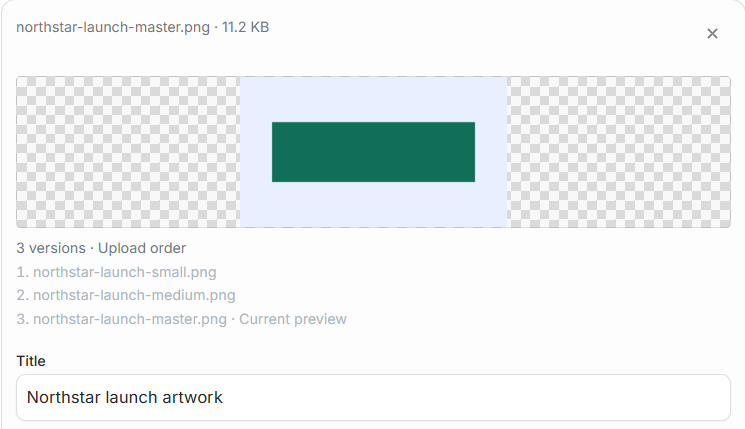
Image guide: In this earlier fictional Context example, the small and medium copies come first. The full-size master is last and is marked Current preview.
For example, a 1920 × 1080 master becomes current ahead of 640 × 360 and 1280 × 720 copies. Filenames such as v1 or v3 do not decide the current version. Separate assets keep the file selection order and do not share a current version.
File limits and failed uploads
Each storage asset file can be up to 250 MiB, subject to the selected type's accepted formats and the service's final checks. Searchable Knowledge and Njord AI attachments have their own limits. A file accepted for asset storage may still be too large for AI reading.
Files save one at a time. The fixed footer shows the file currently being saved and its position in the queue. If an upload fails, the queue stops and shows what remains unfinished.
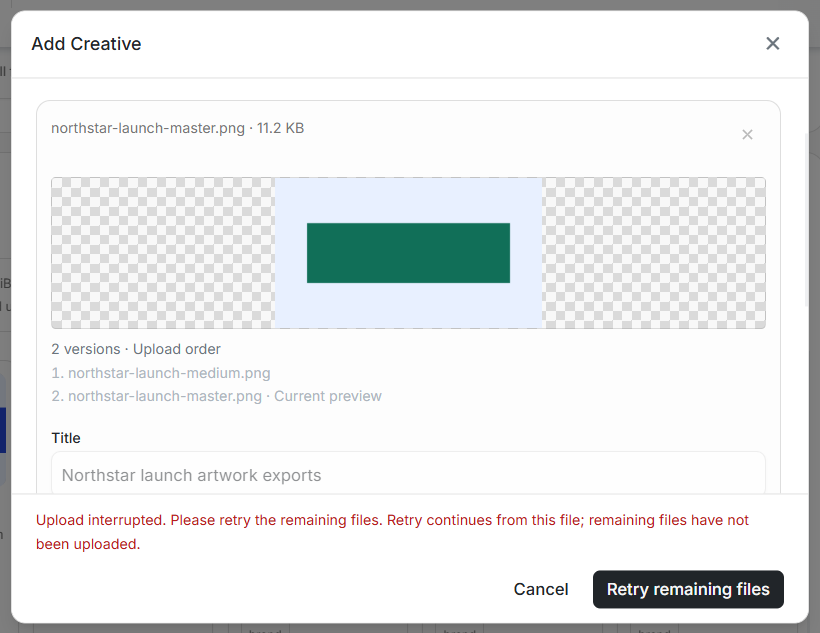
Image guide: This earlier fictional Context example shows an interrupted grouped upload. Retry remaining files continues the unfinished work; files already saved stay in the library.
Choose Retry remaining files to continue from the failed file without uploading completed files again. After a failure, the selection and details stay locked so that the retry uses the same files. Read the error message and check the asset's history before starting a fresh batch.
Cancel and restart safely
- Before saving: Choose Cancel to discard the staged review. Cancelling the native file picker opened by Add more files returns you to the existing review.
- After a partial failure: Cancel closes review but keeps files already saved. Check the library and version history before trying again.
- To create a new item: Close the old review, then choose Add asset again.
- To update a saved item: Open that item's details and choose Add version. Check that the review says Add a version to [asset name] or Add N versions to [asset name] and shows the intended item.
- When the workspace or your access changes: Further uploads stop. Files already saved are not undone.
Check the workspace, item name, file count, grouping and preview before submitting. If the review names an unintended existing item, cancel and reopen the correct workflow.