Cancel a workspace invitation
Cancel a workspace invitation
For Client Admins. Members can accept an invitation; sending and managing invitations requires Client Admin access.
Cancel a pending request when it should no longer be used, for example when the email address is wrong. Completed member removal is a separate task in workspace Members.
Step 1 — find the exact address
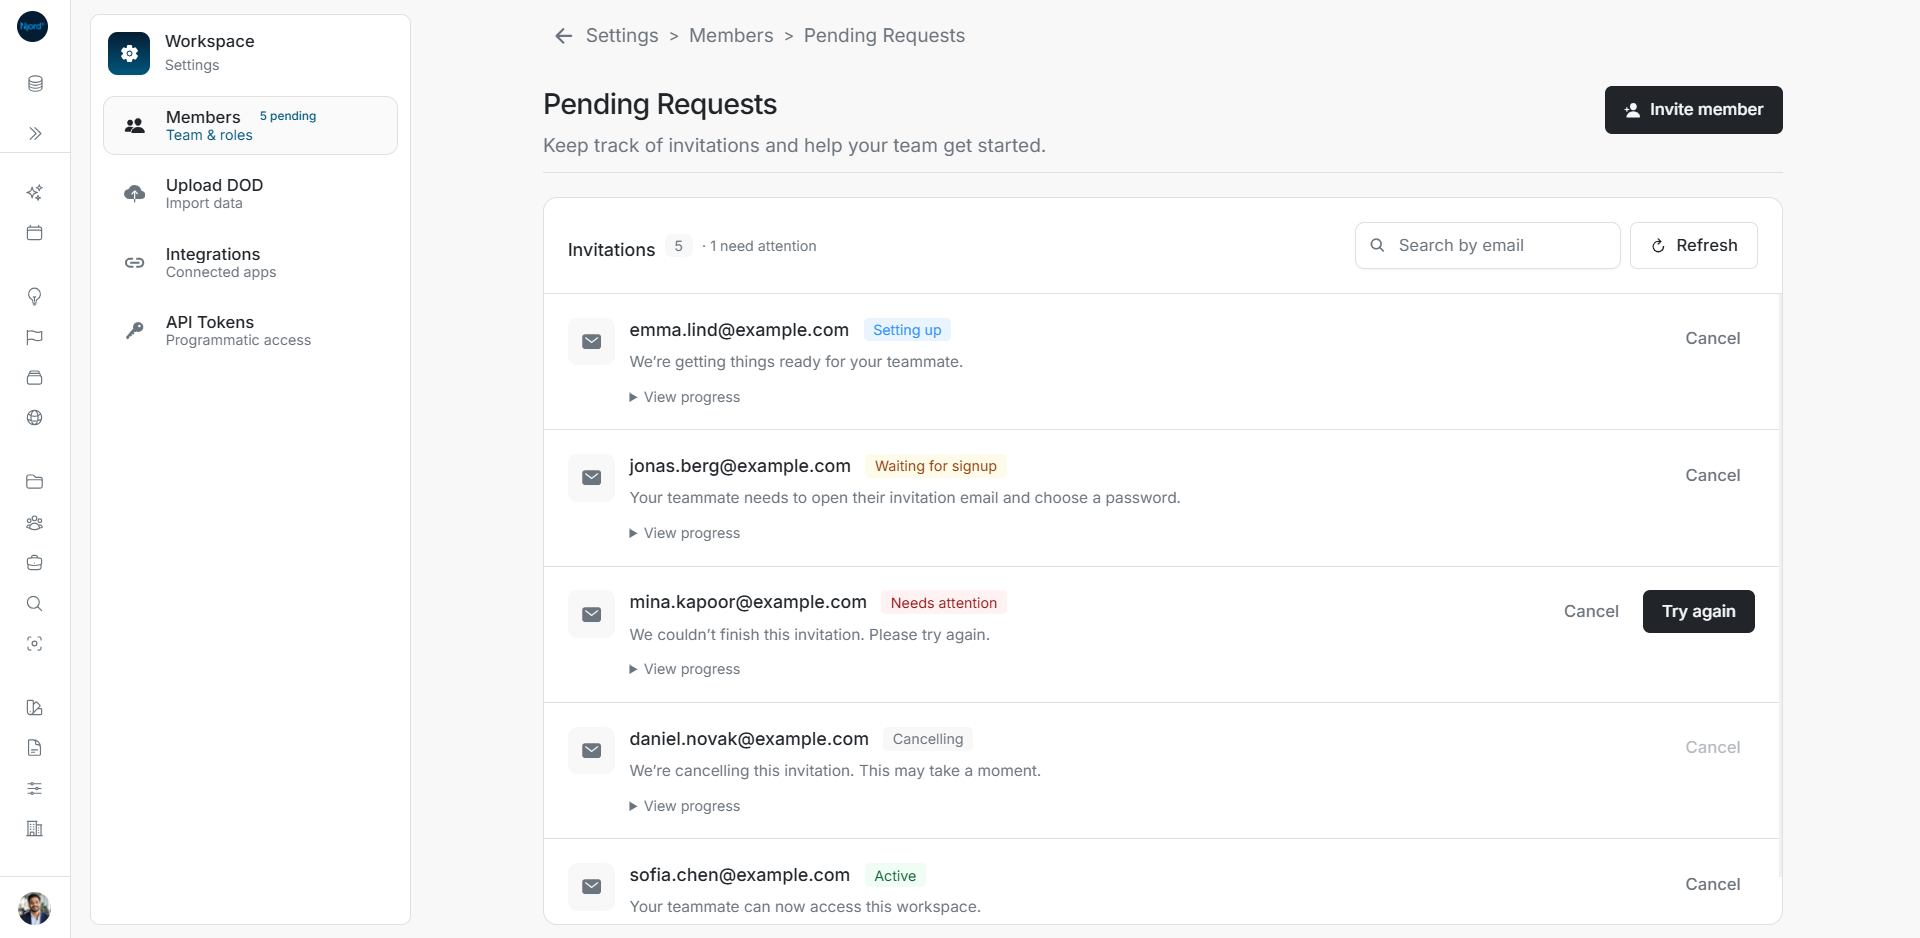
Open Settings → Members → Pending Requests. Search for the invitation email, then check the address and current status. The row's Cancel action applies to that invitation.
Image guide: Pending Requests shows five current invitation states. Fictional sample data in the current app, captured in light mode.
Step 2 — cancel and wait for the result
Choose Cancel once. This action starts from the row; there is no additional confirmation window. Cancelling means removal is still in progress and disables another cancellation of that row. Do not treat that intermediate state as success.
If cancellation needs recovery, the row may offer Retry cancellation. Use that action for the same request. If it instead asks you to contact support, follow that message.
Step 3 — verify the terminal result
When cancellation is confirmed, the request is removed from Pending Requests. In this example the email search remains filled, so the list says No invitations match your search. That means there is no longer a matching pending row; it does not mean every other invitation was removed.
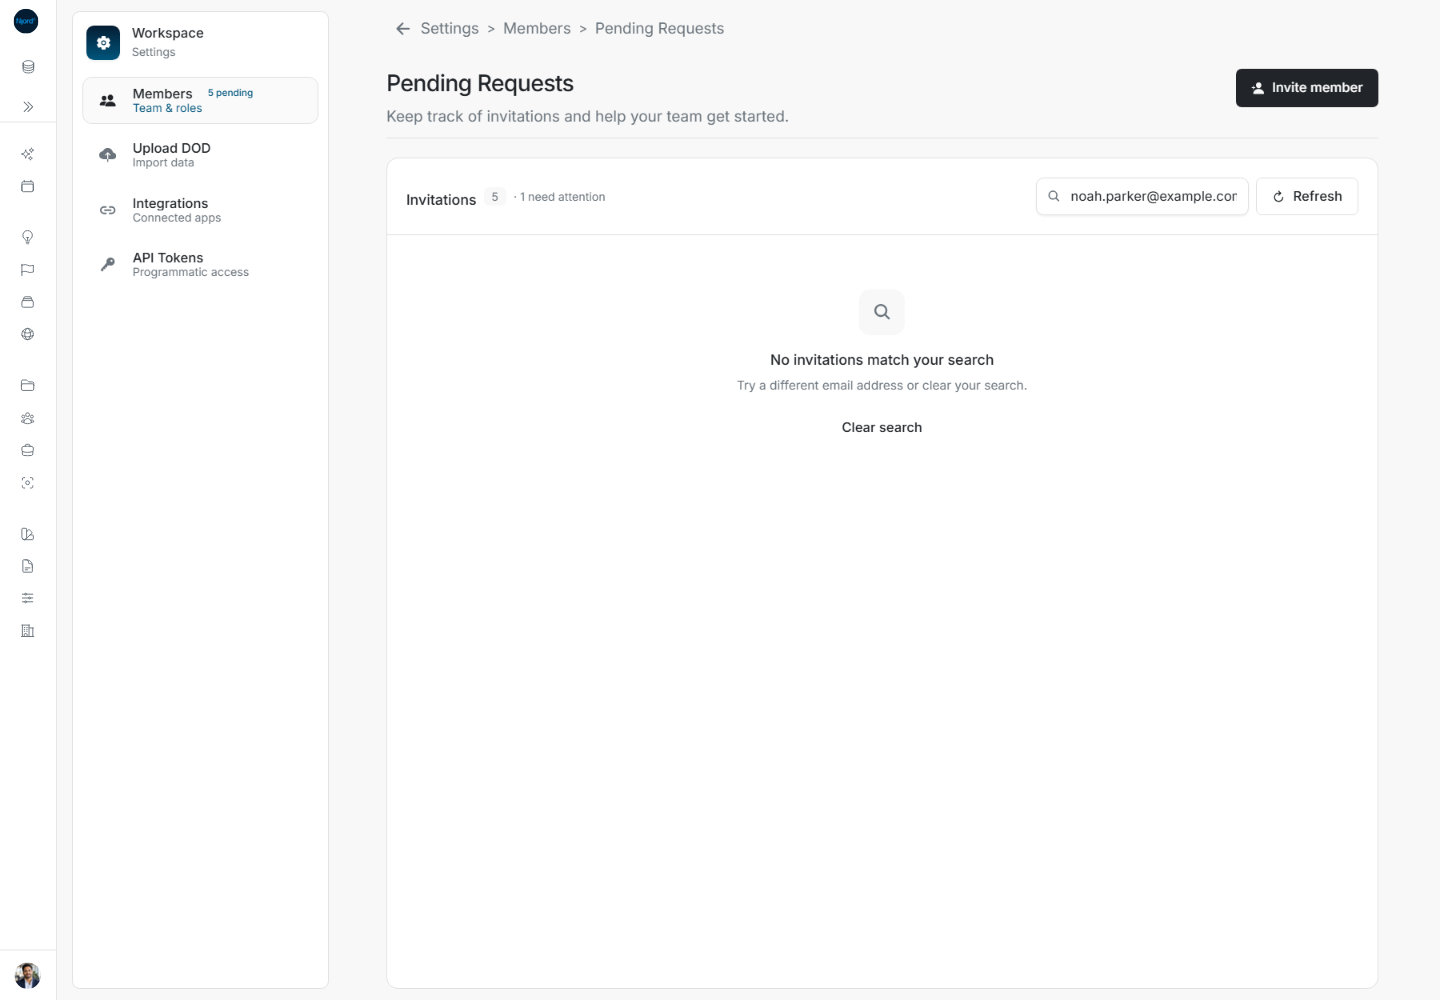
Step 4 — clear the search and check the remaining requests
Choose Clear search to show other pending invitations. If an unfiltered list is empty, it says No pending invitations. If loading fails, an error alert appears instead; use Try again or Refresh to establish the saved state.
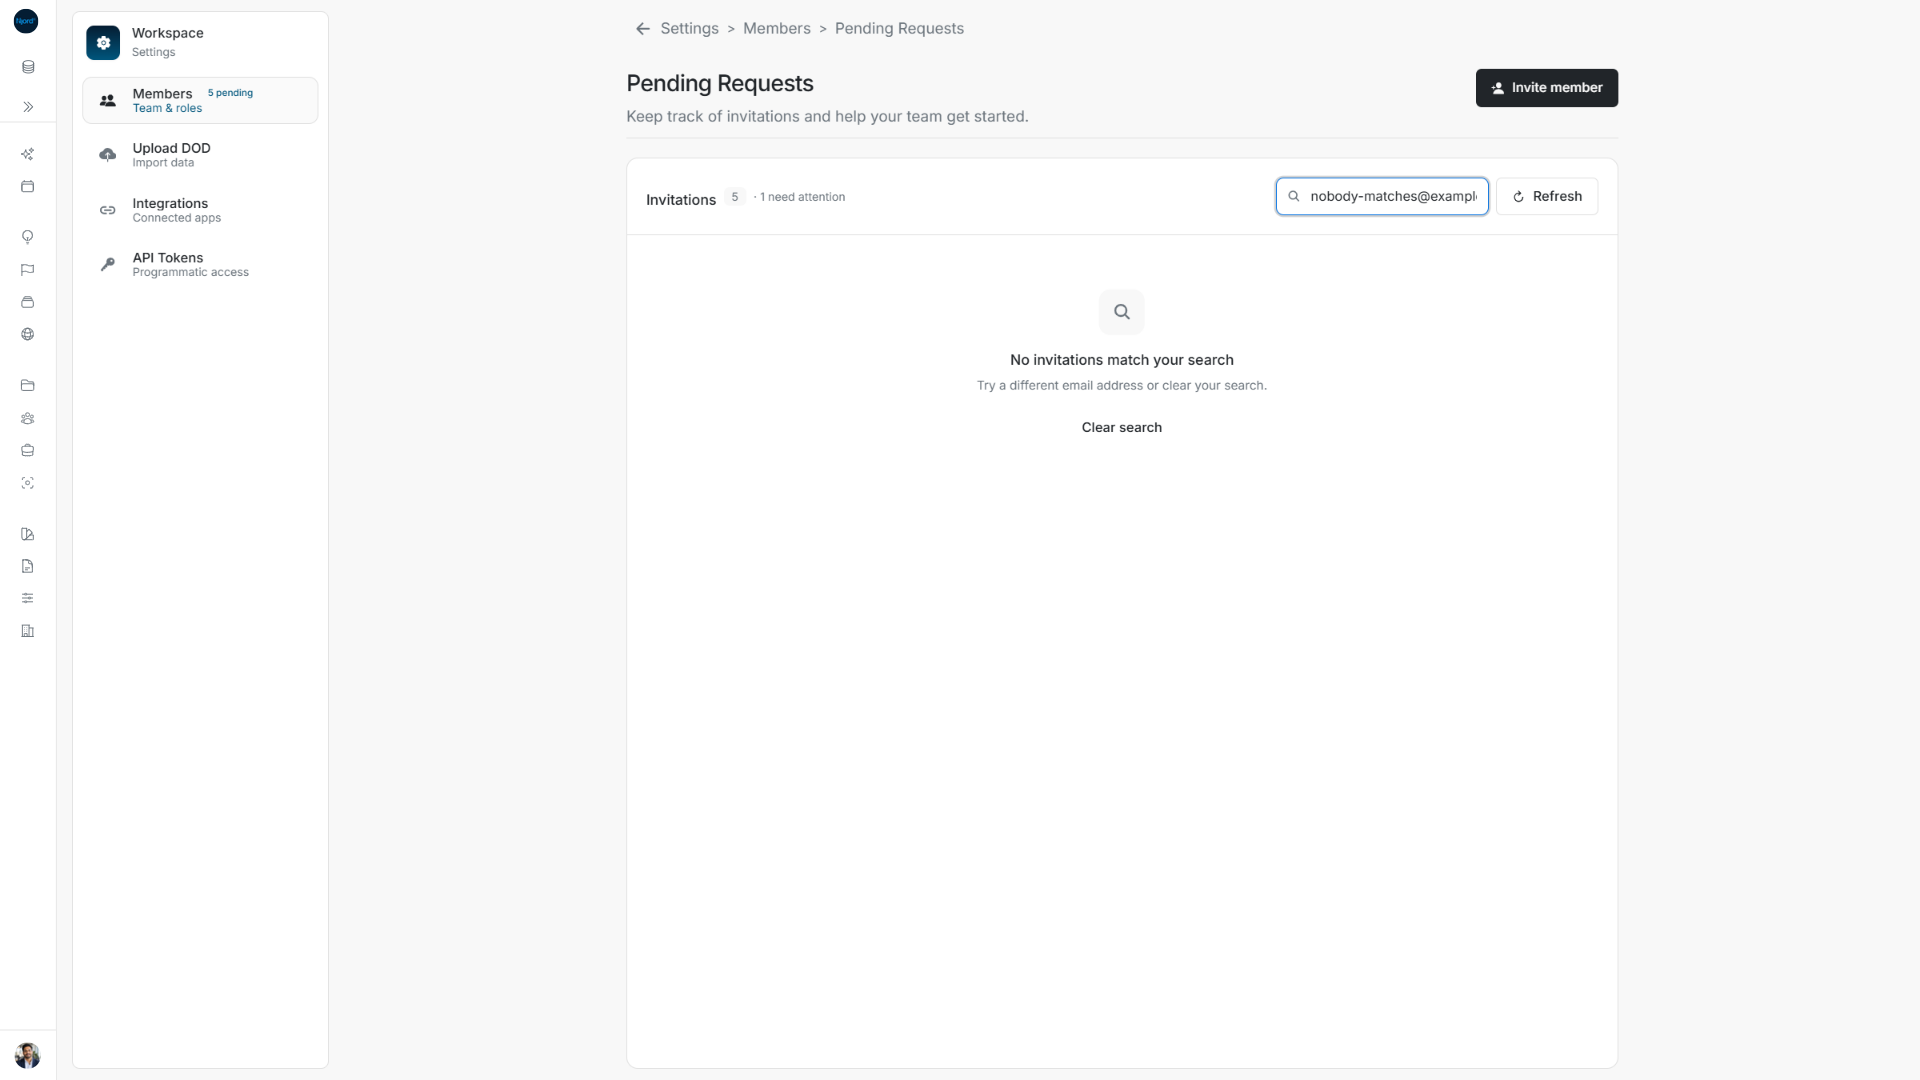
To invite a corrected address, return to Invite member, enter the full address and submit a new request. Cancelling an invitation is not an edit to its email, and it is not the way to remove an already completed workspace member. See Invite teammates to your workspace and Retry or resend an invitation.